How to Publish Jupyter Notebooks to Your Jekyll Static Website
This post was written in a Jupyter Notebook. Here’s how I got it onto my Jekyll website.
Download code: Venture
here and download the
following GitHub gists (thanks to cscorley and
tgarc for putting these together): jekyll.py and
jekyll.tpl.
- I put the
jekyll.pyfile in my GitHub pages folder (i.e.~/username.github.io/). Make sure you read the comments and update the settings where appropriate. - The
jekyll.tplfile is a template file that we’ll give to Jupyter to convert our notebook, so put it somewhere you put your Jupyter templates.
Create and convert your notebook: Go over to your
~/username.github.io/_posts folder and fire up Jupyter:
~/username.github.io/_posts $ jupyter notebook
Once you’re finished writing your notebook, save it, then convert it using the jekyll.tpl template:
~/username.github.io/_posts $ jupyter nbconvert --to markdown
<notebook_filename>.ipynb --config ../jekyll.py
Mind your filename: Jekyll needs your post markdown files named in a specific way in order to pick them up to build, i.e. “YYYY-MM-DD-title-of- blogpost.md”. If you name your notebook with that in mind (e.g. “2017 07 04 How to Publish Jupyter Notebooks to Your Jekyll Static Website”), it will automatically be in the right file name format when you convert it. Once your finished editing just update the title of the post in the markdown file.
Move images: When Jupyter converts the notebook, it saves images into a sub-
directory of the current directory (in our case, _posts/). Unfortunately there
is a bug in Jekyll that throws an exception if it finds a .png file in the
_posts folder (read about the issue
here). Pratically that means you
have to cut+paste the images that were saved in the sub-directory into the
~/username.github.io/images/ folder. If this issue gets fixed that shouldn’t
be a problem anymore and the jekyll.py code can be updated to point to the
saved images in the sub-directory.
Final Steps: After you’ve converted your notebook to jekyll markdown, it’s
time to build. Before you do, go into the markdown and make any final changes,
such adjusting the post title or turning comments on (here’s how you can add
disqus to your site]. Also make sure that the images have been moved
so that the .png files don’t throw an error when you build. Once everything
looks good, run jekyll build and the html files will be generated.
Example
In [1]:
# Normal Distribution
import numpy as np
import matplotlib.pyplot as plt
%matplotlib inline
In [2]:
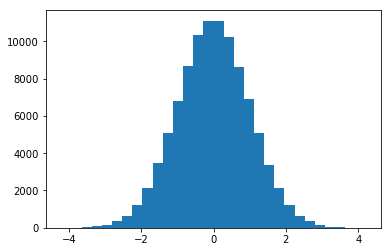
plt.hist(np.random.normal(size=100000), bins=30)
plt.show()